How to setup and manage a recording schedule
To enable a recording schedule for your camera you should first ensure that the firmware for your hub is up to date. For help with how to check this click here.
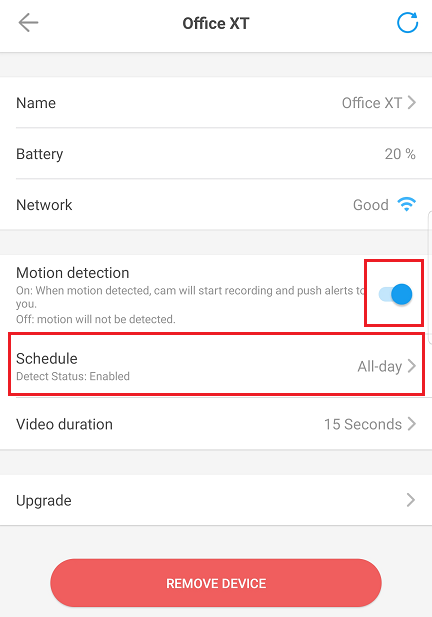
To setup a schedule open the Moobox app, go to Settings, select your camera and ensure Motion Detection is turned on, then tap on Schedule to start setting this up.
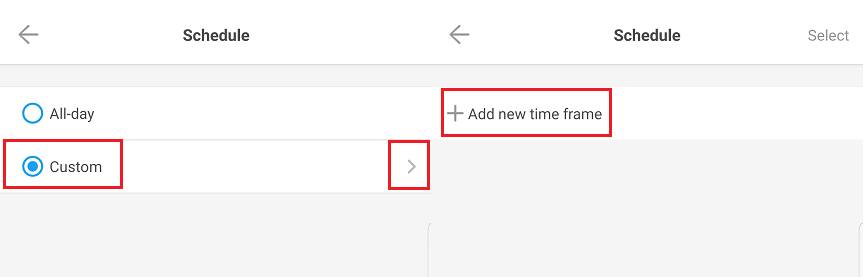
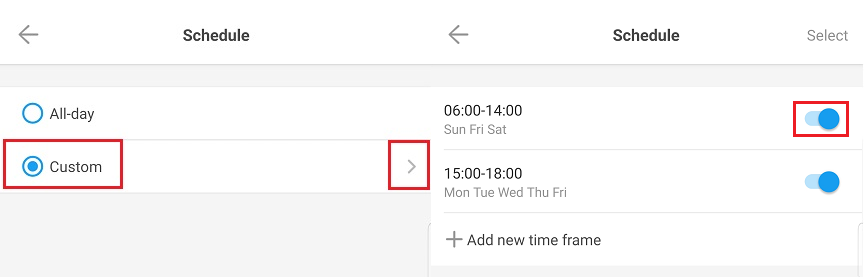
By default the camera will be set to All Day, select Custom to set the camera to your own schedule then tap on the arrow to move to the schedule setup page. To begin the setup select Add new time frame.
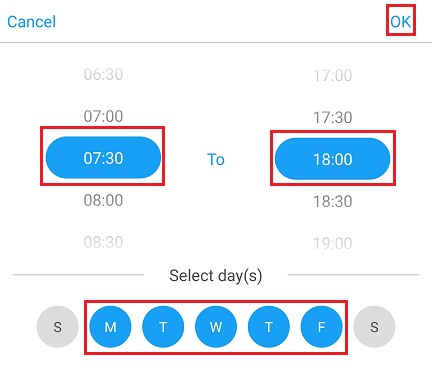
You can then select the hours for your schedule and the days of the week that this will run, tap on OK to save. For example if using the schedule below the camera will be active between 7:30am and 6:00pm Monday to Friday. Outside of these times the camera will not detect motion or record clips.
You can set multiple schedules for each camera so you could have one schedule for weekdays and another for weekends or you could have the camera set to be active 24 hours a day but only on specific days.
Once you have setup your schedule you should leave the Motion Detection slider set to ON for the camera to record using the scheduled times and days, turning this off will disable all Motion Detection including any set schedules.
How to delete or disable a schedule
There are several ways to disable a schedule that has been set for a camera.
To disable all schedules and have the camera active 24/7 go to Setting, select your camera and select Schedule, then select All-day. Select the back arrow to save the change. Once set the camera will detect motion at all times.
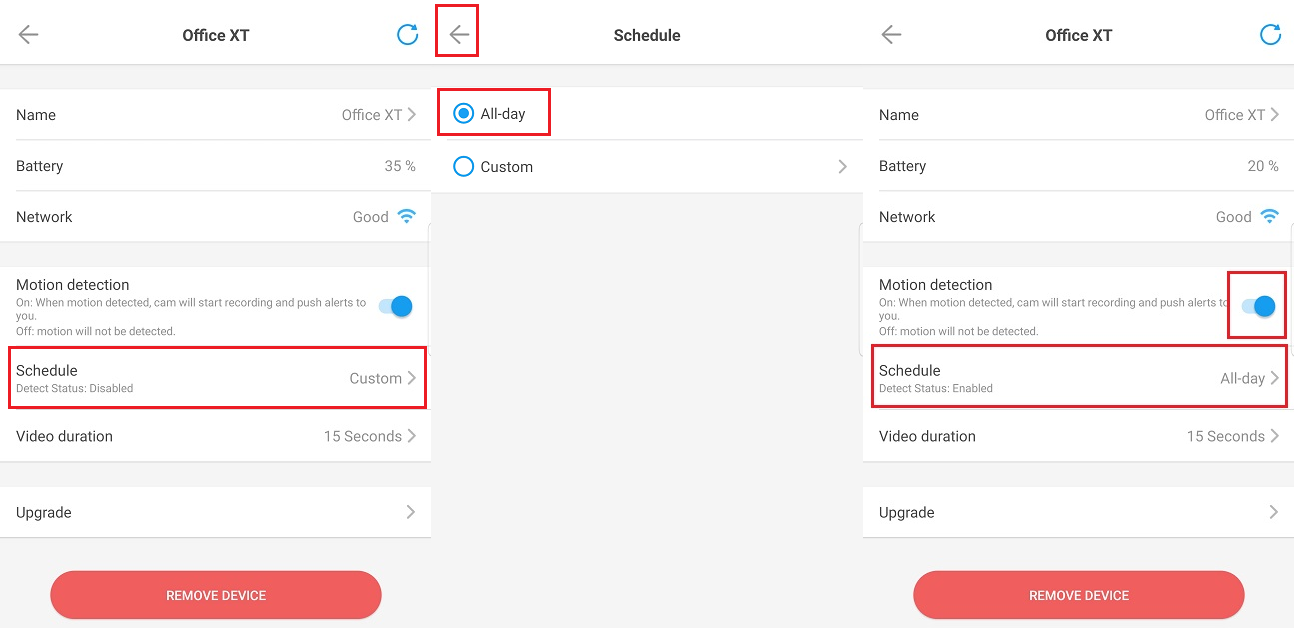
If you have multiple schedules set and wish to only disable one or some of these, go to Settings, select your camera, select Motion Detection, select Custom to see the list of schedules setup for this camera. You can then toggle each schedule on and off.
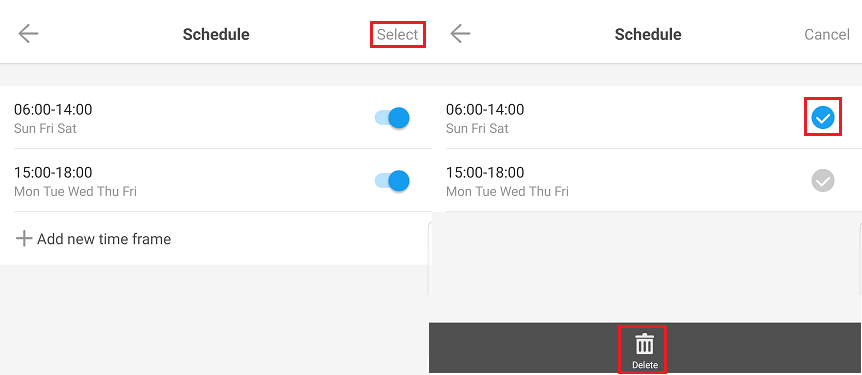
To delete a schedule go to Settings, select your camera, Schedule, Custom to see the list of schedules setup for the camera. Tap on Select, tap on the schedule you wish to delete, then tap on the delete button at the bottom of the screen.
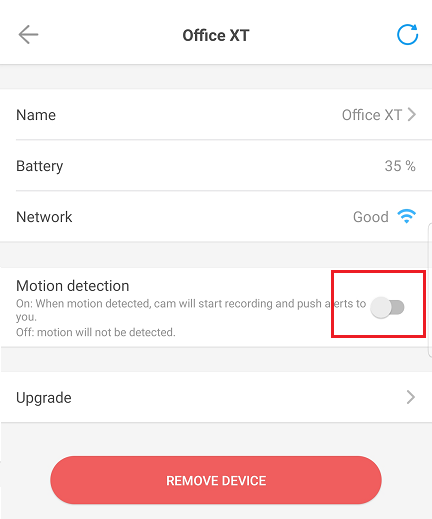
To disable all recording including any schedules go to setting, select your camera and then set Motion Detection to off. Using this option means that the camera will not start recording until you manually enable the Motion Detection again.
How to setup an overnight recording schedule
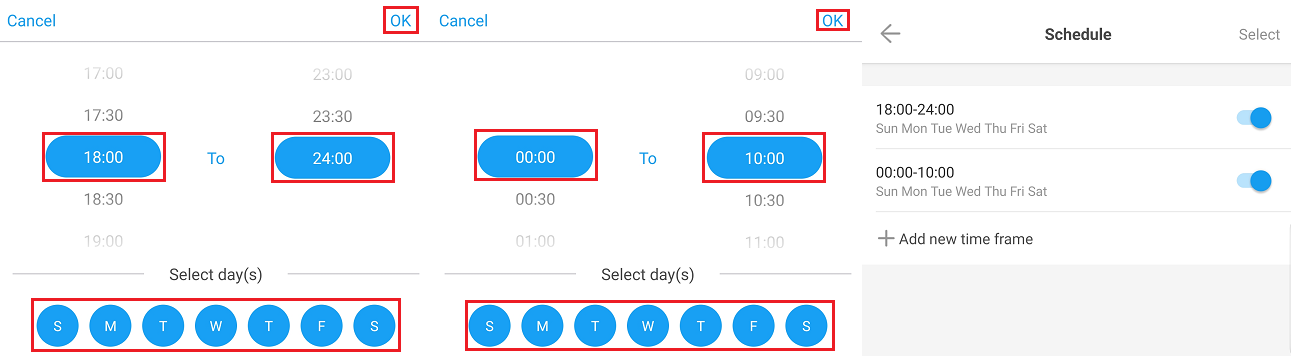
To setup an overnight schedule this will require two schedules to be set, one for the first day up to midnight and one for the second day from midnight onward.
For example, to have a camera active from 6pm to 10am every day you would first setup one schedule for 6pm to midnight and then a second schedule for midnight to 10am.